


Have you tried the Monster Hunter Stories 3 (MHST3) demo yet?
It’s easy to jump in thanks to save-data carryover, but the Feral monsters are tuned way harder than you’d expect…
If you’re doing the demo “endgame” grind, the first major wall is usually Feral Nerscylla.
If you don’t understand how counterattacks and the Wyvernsoul Gauge work, you can get wiped in one hit.
Honestly, I’m not even sure the demo expects you to beat it.
I might just skip Feral Nerscylla…
In this post, I’ll show you a survival-first method that ignores raw damage and focuses on consistency.
Here’s the conclusion first—
Conclusion
Armor: Namielle (Tentacle set)
Weapons: Any Bow with Accuracy Down + Magia Charm
Game plan
・Use the Fire-type Egg Skill “Heat Shimmer” to stack Evasion up to 3 tiers.
・Spam Accuracy Down with a Bow.
・When you have a safe opening, apply Poison / Severe Poison / Burn for fixed damage.
・If things get scary, use Ride On and Life recovery to stabilize.
(In short: Evasion buff → Accuracy Down → chip with status → manage the Wyvernsoul Gauge.)
A video guide is also available.
From here, I’ll explain everything step-by-step—from farming the gear to the exact battle flow.
Feral Nerscylla Overview
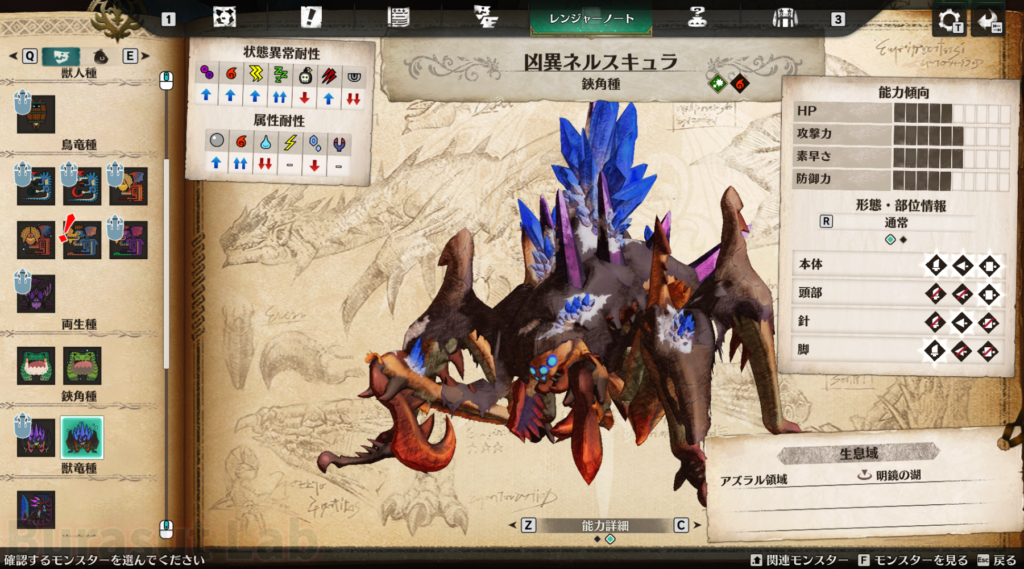
Nerscylla is weak to Water and Ice, and resistant to Poison / Burn.
The demo level cap is 10, so most attacks will effectively one-shot you.
Trying to “trade blows” is a losing plan.
The win condition is simple: avoid getting hit, and recover instantly when something goes wrong.
Behavior Pattern
| Normal |  |
| After changing state |  |
It can shift into Speed-type behavior after a state change.
If you can finish stacking buffs early and start dodging reliably, the fight becomes much easier.
Honestly, if the opening turns go badly, resetting can be faster.
For “pray RNG” fights, the early turns matter most.

Wyvernsoul Gauge: 6 (same as Feral Brachydios)
In the demo, it’s hard to fully break the gauge consistently without specific debuffs, but…

After it uses its big move, the gauge reduction rate can spike (Large), letting you take a down safely if you dodge and respond correctly.
Basic flow
・Usually starts as Technical-type
・After a state change, it shifts toward Speed (prepare a Technical move user for Head-to-Head)
・A single AoE (like sleep gas) can collapse the run, so the “setup phase” is the real RNG
To erase those wipe-level accidents, we lock in our gear, party settings, and buff routine.
Gear Farming
First, build your durability foundation.
Namielle can appear in the demo, so we’re farming the Tentacle set for high defense and stamina stability.
How to farm the Tentacle set
- Set the time to night
- Hunt small monsters around the lakeside (Ludroth packs make it easy)
- After several hunts, the game autosaves during loading and a cutscene triggers—Namielle appears
- Use the nearby updraft to reach the center of the lake (swim partway if your Monstie makes that faster)
- Run into Namielle to start the fight → losing is fine
- Grab the materials dropped where Namielle was
- Repeat until you collect 3 materials
You’re looping to lose on purpose. It’s fine. I promise.
In the full game, progressing normally is obviously faster.
But for demo Feral hunting, this set is strong enough to justify the detour (and you can reuse it for Feral Brachydios too).
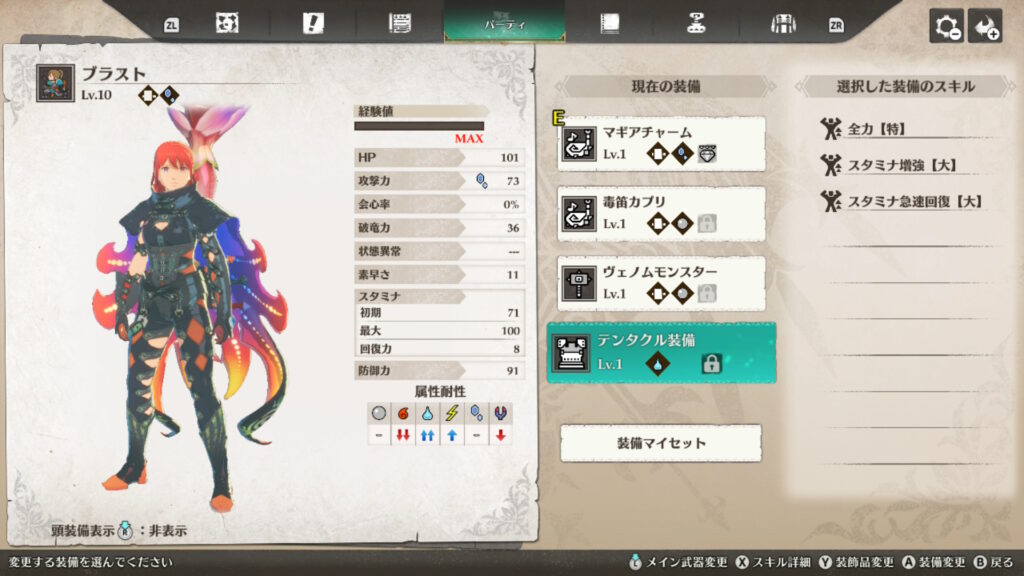
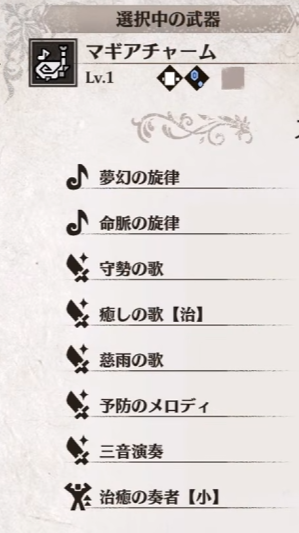
Required weapon: Magia Charm
Your must-have weapon is the Magia Charm.
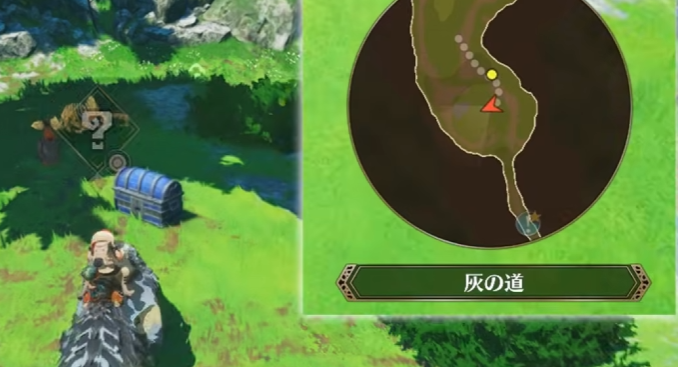
There’s a chest with the required materials right after entering the Ashen Path.
Where to get it
Key songs
・Life Pulse Melody: restores Life (your core stabilizer)
・Guard Song: Defense & Evasion buff
For the Bow, Namielle’s is ideal, but any Bow that can apply Accuracy Down works. If you want the easiest option, a basic Iron Bow is fine.
Battle Buddy Settings
If you want maximum stability, bring Ogden.
If you want more damage, go with a partner who brings Legiana as a DPS slot.
Either way, set tactics to “Prioritize the same monster”.
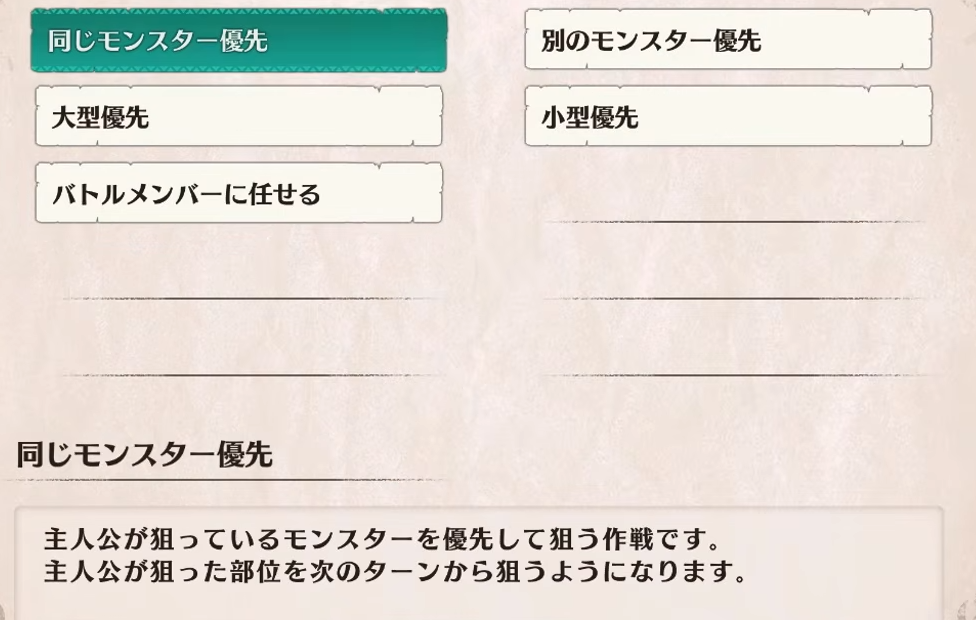
This reduces those random disasters where allies hit the wrong part and eat counterattacks.
(Sometimes your Monstie will still ignore it and die anyway… which feels like a bug.)
Recommended Party
Unlike the “specific Monstie army” style for Feral Brachydios, this fight is about roles:
Evasion buffer + Head-to-Head coverage + status chip.
Monsties (roles)

- Required: a Fire Monstie that can use “Heat Shimmer” (Evasion buff)
Fire Ludroth is popular, but anything with Heat Haze works.
Gypceros / Yian Kut-Ku etc. are also fine.
Heat Haze stacks in 3 tiers (Small → Medium → Large). If you reach tier 3 and maintain it, you’ll see the win. - Required: a Monstie with Technical moves
You need this to answer Speed moves after the state change. Nerscylla itself is a valid option. - Status chip (Poison)
Poison is enough. If you already have Dreadqueen Rathian, Severe Poison speeds it up—but swapping can drop your Evasion buff, so do it only when safe.
(If your buddy is Ogden, Pukei-Pukei can apply Poison reliably.)
The key is: keep “Heat Shimmer” as your main Monstie and stay stable.
Constant swapping makes buff management messy because your Evasion buff can disappear. Only swap on safe turns (like right before a down).
If you want extra damage, a partner who brings Legiana can also help as a clean damage source.
Battle Flow
From here it’s the real fight. The plan is consistent: if the early setup succeeds, the rest becomes simple.
Turns 1–3: setup
Your top priority is stacking Evasion.
Start with Heat Haze from turn 1 and aim for 3 tiers (Large).
- Prioritize Heat Haze (aim for Evasion Large)
- On the hunter side, Bow → Accuracy Down is great if you can fit it in
- If an AoE looks scary, use traps to buy time (items make this even safer)
If you can survive until you start taking downs via Wyvernsoul Gauge timing, the rest becomes much easier.
If you get hit by an AoE before buffs and recovery are ready, you can just lose. That’s the demo life.
Mid game: poison chip + build Kinship
Once dodging is stable, apply Poison and build Kinship.
Your buddy also uses traps/heals, and you don’t instantly fail when the ally faints—this “rasta-like” behavior helps a lot.
・If you have nothing urgent to do: prep melodies or keep poking with Accuracy Down
・If Life drops: use the Life Pulse Melody and try to keep Life at 3
This simple rule-set keeps the run stable.
When it changes state: answer Speed
After the state change, Speed moves become a threat.
Fire Ludroth alone can’t cover everything, so have a Technical coverage Monstie ready when you need Head-to-Heads.
If breaking the Wyvernsoul Gauge is close, swapping to a Hammer for a clean finish is also an option.
That said, outside of Head-to-Heads, if you’re dodging consistently, you’re fine—so don’t force swaps. Keep Heat Haze as your base.
Emergency insurance
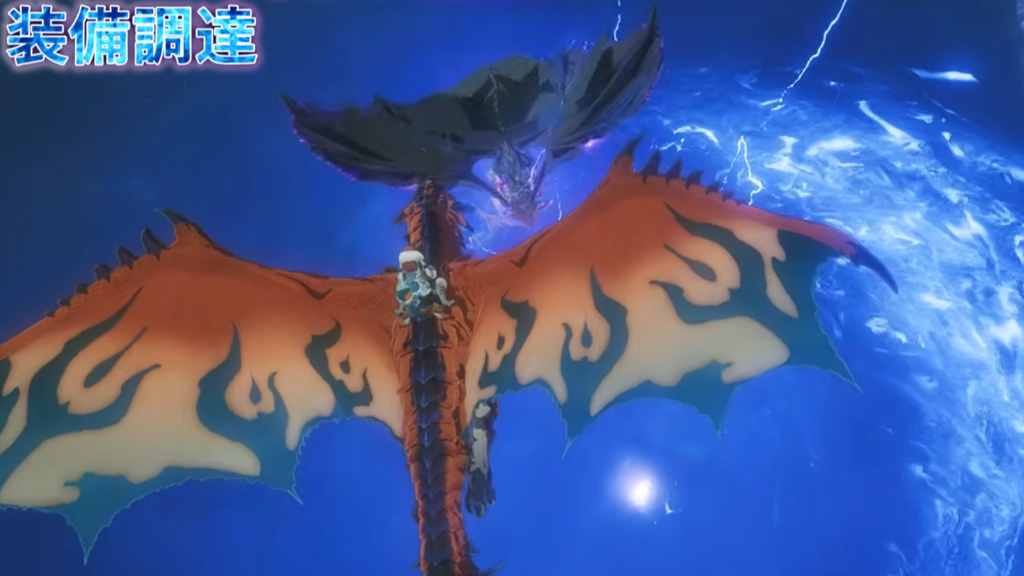
If you feel “an AoE is coming” or “the gauge won’t break in time,” use Ride On as insurance.
While riding, you can usually survive one big hit from Feral Nerscylla, so don’t get greedy—refresh buffs and stabilize.
Wyvernsoul Gauge management
Kinship Skills shave off a big chunk of the Wyvernsoul Gauge, so if you’re on the edge, it’s safer to take the down first and then use it.
Once you break the gauge, you avoid the scary move and can safely push damage on the next turn.
After the hunt
At the end of the day, it’s basically “stack evasion and let status chip do the work.”
If you never let the Evasion buff drop, you can carry the fight to a clean win.
If you’re confident with fixed damage from Poison/Burn, bringing a higher-damage buddy can speed it up.
It took me about three attempts. With “pray RNG” strats, that’s normal.
Beating Feral Nerscylla in the demo unlocks a new hub and more hatch options.
That means you can get Water-element Gypceros (and variants), which becomes the key to beating Feral Brachydios next.
PR
After Feral Nerscylla, it’s time for Feral Brachydios.
Compared to Nerscylla, it’s actually less RNG-heavy, and I have a highly repeatable no-item method here:
[MHST3 Demo] How to Beat Feral Brachydios – Recommended Party & Strategy

If you follow the steps while reading, it becomes much more stable—check it out.
I also post MHF lore/explainer videos—feel free to drop by between hunts!


コメント